Posts

Showing posts with the label gift tag

Early Spring

Image
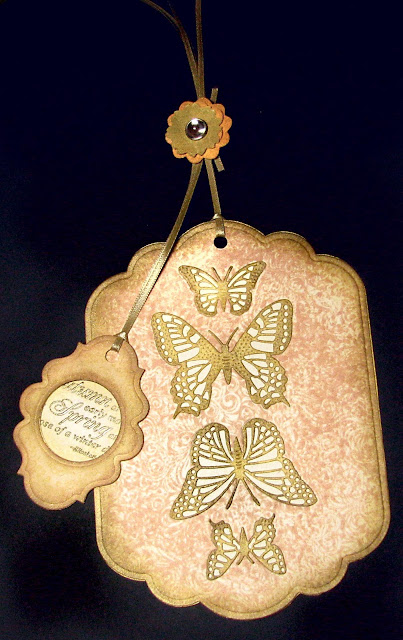
Everyone around me seems to think it is Spring all of a sudden. Three of the challenges that I follow, if not actually enter, are asking for Spring themed cards. The farmer's market was packed, and even the grocery store seemed busier than usual. I made this card for the   Justrite Stampers  Friday Challenge, "Suddenly Spring." (Nice name.) Early Spring I used the retired Justrite Original Nature's Nested set for my sentiment, cropping to feature the words "early Spring." The frame is stamped with a stamp from the Kindness set . Early Spring sentiment I cut out the butterflies with Cheery Lynn's Exotic Butterflies medium and small from the middle of a sheet of paper. Then I inked gold onto the butterflies and stamped the background with Justrite's Elegant Fronds background stamp (my favorite background) several times to cover the full area of the card. I cut out the card using a Spellbinder's Grand Calibur die, and sponged the edges ...

Airplane Magnet Tag

Image
My entry in the JustRite Challenge #77, "Tag You're It" is really these Dress Magnet tags , but I colored this other magnet while Benjamin was working on his tag, and decided to include it as well. I'm enjoying this magnet paper, but you have to double it to use it since the magnets are so wimpy. For this one, I cut out two sheets of magnet paper with my JustRite  Vintage Label and Banner Dies , and then stamped the airplane from JustRite's  Going Places  cling set on cardstock. I colored the image and glued the magnet on the back. Then I made the tag/holder for the magnet using a Spellbinders die and the larger die from the  JustRite Vintage Label and Banner Dies . I stamped the image again in mauve and cut it out with a Spellbinder classic circle. Here's the disassembled set: Thanks for looking!

Magnet Dress Tags

Image
My dress stencil just turned die cut. I'm using the cut-out this time, to make these magnetic dress tags for the JustRite Challenge #77 "Tag you're it!" Magnetic Dress Tags I drew the dresses in Adobe Illustrator and cut them out on my Silhouette cutter (to make stencils, originally, here are some stenciled dresses ). I cut out some dresses from white card stock, and another set from magnet paper. I stamped and sponged them, and then colored them with my Prismacolor Pencils, blending with so called Odorless Mineral Spirits. On the purple dress, I used a stamp from the JustRite Original set called My Garden Set . I love the flowery dress; I was going to do them all in flowers, but I decided to shoot for variety.  The To and From stamps on all three dresses are part of a stamp in the   From Our House Set , and cut out with a die from JustRite's  Vintage Label and Banner Dies . Magnetic Dress Flower Tag On the Christmas dress, I used a snowflake posta...

Shirt Tag

Image
I drew a Hawaiian Shirt (two days after the challenge that inspired me was over) and made a stencil. Then I used the embossed resist technique to decorate it with white flowers. The stamp is from Inkadinkado. Hawaiian Shirt Tag I'm going to make a few more shirts, but I was happy enough with this first go to show it off. I love to sponge through stencils. Fabric seems to come out extremely well with this technique. In addition to this shirt, I've also made an apron and a dress . This shirt is actually three stencils. Here are the outlines: Shirt stencils If you want to use my stencils to make your own wardrobe, and have a cutter that can cut from an Adobe Illustrator file, I'd be happy to share. Shoot me a message. Thanks for looking!

Floating Away Tag

Image
This week's tutorial on Splitcoaststampers.com is for a technique called Embossed Kisses , in which you ink an embossing folder and pick up the ink on an inked solid colored stamp, and then impress the image on paper. I used Cuttlebug's Paisley embossing folder and a hot air balloon from Local King Rubber Stamps . Floating Away Tag The Embossed Kisses technique worked great, and was very easy to do. It took me 7 or 8 perfectly stamped and then otherwise muddled up balloons to figure out what I was going to make with my image. I learned two things: 1)  Tags are fun to make. Spellbinder accents can make any rectangle look like a tag. I used my new corner rounder, too, which made the tag look a lot more finished than it did with pointy corners. I like the shadows that the embossing gives the shapes I get from Spellbinder Nestabilities. When I cut a rectangle without the dies, it looks terribly flat to me, now. Sponging the edge of the paper helps a lot (and makes the paper...