Posts

Showing posts with the label butterfly

Creative Chemistry 102 Day 2 Butterfly

Image
OK, so it is already Day 5, but I had so much work to do. I'm taking a break from it to try some more of the techniques in Tim Holtz's Creative Chemistry 102 class. Day 2 focussed on stencils, one of my favorite tools. I like cutting my own stencils from transparency paper, which is slick and easy to sponge through, and thin enough to stamp through. This time, however, I used a stencil from Crafter'sWorkshop. I made two samplers, and pasted them to the two sides of this middle sized butterfly. I was inspired by Tim's choice of blue and brown, but decided that I was in a green mood, and chose Distress Ink in Evergreen Bough and Vintage Photo instead. I like the speckled appearance made from little specks of clear embossing powder. Here's a close-up. Here's the start of my butterfly mobile project , including a butterfly made using Distress Paint as a resist, and here is a butterfly made using Distress Paint to create a faux patina look. Maybe there...

Creative Chemistry 102 Day 1 Butterfly

Image
I am taking Tim Holtz's on-line " Creative Chemistry 102 " class this week. I didn't get to even start watching the videos until my kids went to bed, so I didn't have a lot of time to play with the ideas. It's the middle of the night now, so I'm going to show off my butterfly and not write a word about it.  (OK, a few words: Tim Holtz uses tags for his samplers. I use butterflies. Here is the start of my butterfly project .) I do enjoy these paints and inks! Great stuff! Thanks for looking.

The butterflies are coming!

Image
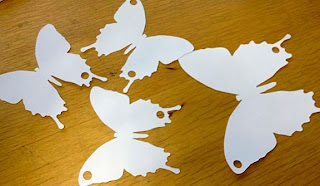
For some reason, the media (magazine articles, books and so on) about mixed media art seems to be half techniques, tools and materials, and half self help (egging the reader to have, for example, "the courage to create"). I am interested in the former, being already brave in the face of art supplies. I welcome recommendations for books, tutorials, blogs (yours?) or whatnot related to mixed media. My own next mixed media undertaking is underway. I began by drawing butterflies and cutting them out on my Silhouette cutter. I cut black butterflies a tiny bit larger, to matte these. I glued four black ones together to make a thicker more sturdy element. They are exactly the same shape, thanks to the cutter, and layered easily. My plan is to hang these from their holes. Next I decorated four white ones, and glued them to the front and back of two of my thick black butterflies. Here's one side: I stamped the flowers using Distress Paint, and then used Distress Stain ...

Early Spring

Image
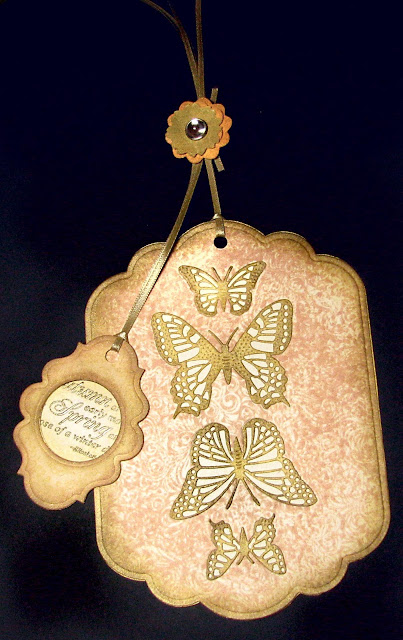
Everyone around me seems to think it is Spring all of a sudden. Three of the challenges that I follow, if not actually enter, are asking for Spring themed cards. The farmer's market was packed, and even the grocery store seemed busier than usual. I made this card for the   Justrite Stampers  Friday Challenge, "Suddenly Spring." (Nice name.) Early Spring I used the retired Justrite Original Nature's Nested set for my sentiment, cropping to feature the words "early Spring." The frame is stamped with a stamp from the Kindness set . Early Spring sentiment I cut out the butterflies with Cheery Lynn's Exotic Butterflies medium and small from the middle of a sheet of paper. Then I inked gold onto the butterflies and stamped the background with Justrite's Elegant Fronds background stamp (my favorite background) several times to cover the full area of the card. I cut out the card using a Spellbinder's Grand Calibur die, and sponged the edges ...

Celebrate!

Image
Celebrate! Why not? I had a great time going to the Anaheim Scrapbook Expo with my friends last weekend. I decided to use Justrite Friday Challenge to try out some of the products I purchased. Here's my card, "Celebrate!" Celebrate! Justrite Friday Sketch Challenge #090 This is my second sketch challenge. I'm still getting the hang of it, which in my case means I pretty much copied the sketch. My favorite new item so far is the glittered embossing powder I bought from  Sparkle N Sprinkle . I have long wanted to glitter my stamped images, and I've done it with the glue stamp pad, but what a pain to clean the stamps and myself and my work area.  I shy away from that glue every time I think of using it. The Sparkle N Sprinkle product is embossing powder infused with glitter leaving the image both crisp and sparkly. Neither the pictures in the Sparkle N Sprinkle shop that I linked to above, nor these pictures of my card really do a great job showing the glit...

Remember when

Image
Remember when life was simple? I'm not sure I do. When you look at these images, please click on them, to see them without the greenish background on my blog. I made this card for the Crafty Girl's Challenge #2 , use two die cuts. I rarely use fewer than two die cuts, so this restraint was not very challenging! Remember When I used a stamp from Heartfelt Creations Mystic Hideaway for the focal. I colored it with my Copic markers, using light pink and warm grays, and then added some texture with my Prismacolor pencils. I framed the image with two dies from Spellbinders' Fleur de Lis Squares , cutting away the center of the inside square with a die from Classic Squares . I love the way the vines on the trellis around the image peek out around the frame. I stitched a piece of patterned paper, which coordinates amazingly well with this image, from a set I bought years ago called Girls to Women, from Busy Scrapper's Solution to a piece of brown card stock for th...

You Look Smashing

Image
This one is inspired by the Just Us Girls Challenge blog. Here's the how-to sponge video from Gina K. I watched her stitching on cardstock video as well, before having a go. I love to sponge, so when I saw the Just Us Girls sponging challenge, I hauled out the stencils that I made a few years ago (here is my post " Butterfly Dresses " from 2010). I drew the dress image in Adobe Illustrator, and then cut it out of an overhead transparency (acetate) on my Sihlouette cutter . Then I sponged through the stencil, and stamped over it with a butterfly background stamp (it's unlabeled, so I don't know where it came from). I like the idea of stitching on card stock, so I gave that a try here. I now am certain that I need more colors of thread.  Every time I try a new technique, I end up needing more equipment! I have a confession to make: when I uploaded this card to the challenge, it had fewer elements. I had thought I was done, but changed my mind, and add...

Spring Sprang Sprung!

Image
I made this card for a Justrite Friday Challenge #69, to create a card with spring colors and butterflies. I am enamored with Justrite Stampers at the moment (and Spellbinder dies). Justrite is having a sale , retiring last year's collection, and well, I indulged myself with some new images and borders, including the one I used  in this card. Spring Sprang Sprung! Image from Just Rite Stampers' Plant a Little Love I have been poking around the tutorials on Splitcoaststampers.com for some time now, learning everything as fast as I can. In this card, I used the technique in Beate 's tutorial called Bleached out Images , in which you stamp and emboss the image on colored paper, and then bleach out and color (or not) in the lightened areas. I bleached out the flower, leaves and border in this Justrite image, and used my Copic markers to color it in. Before I bleached out the image, I sponged on some color (to dim the green paper a bit). I usually mask my image whe...

Masking with borders

Image
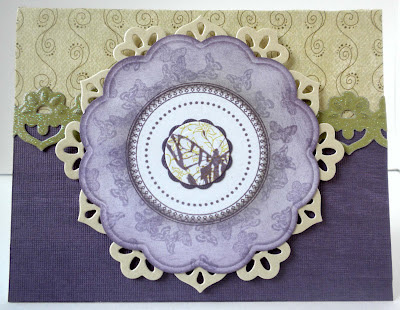
When I made the inside of the last card for Georgina , I stamped the border, masked the center and added snow flakes around the outside. I really liked how it worked out, and decided to explore that idea a bit more. I am trying to get a framed effect like that of the stamps from Justrite Stamper designed to coordinate with various Spellbinder dies. The Kindness cling set is a great example. Here are two cards that I made to show off the results of my efforts. The design for Just-a-Peek Butterfly was inspired by the Splitcoast Stampers technique challenge " Crop it ." The butterflies in the purple border were stamped on white paper using a single mini butterfly stamp (I think from Hero Arts in their Itty Bitty series, but I'm not sure). Just-a-Peek Butterfly I tried my hand at the technique I mentioned in my previous post for making round cards that open in Wishing You Happiness (and Chocolate) . Wishing You Happiness (and Chocolate) The yellow-green flo...