Posts

Showing posts from 2011

I'll make a mathematician out of you yet

Image
I have been surfing around in the polymer clay folks flikr pages, and I came across an old blog, called " Dora's Explorations ." Dora made a terrific shaded polymer cane showing the Bhaskara's Behold! proof of Pythagoras' Theorem. (She also made a tutorial; the link is below the image.) http://dorasexplorations.wordpress.com/2009/07/07/cane-of-the-week-7509-behold-part-ii/ Making the clay blend so that the shading in this cane went the way she wanted it to lead her to experience mathematics in the very way that mathematicians experience it in the course of research. She wrote: "I had to make a Skinner block that would shade diagonally from the corner.  Another 2 or 3 frustrating hours were spent in trying to figure out how to do this.   If I had better mathematical or mechanical skills, I would have been able to mentally ’track back’ from the finished shaded triangles to the initial Skinner blend.  But instead I had to cut out little shaded pap...

Diamond Net Beads and Kia's Green Lampwork

Image
My friend Kia Dallons and I were friends in high school, but we've only just reconnected through facebook. As it turns out, we are both making jewelry. Kia describes herself as seamstress, costumer, illustrator, sculpter, mold-maker and glass artist. She sent me some of her lampwork beads (which surreptitiously arrived on my birthday; nice present!). Here is the necklace that I made with them. Thank you Kia! It is nice to return to the old favorite patterns from time to time. The beaded beads in this necklace are mini Diamond Net Beads . The Diamond Net Bead has the nice distinction of being the first beaded bead that Gwen and I designed together. Gwen and I met at a math conference, and about a month later, she visited my department to give a presentation. She stayed at my house, and brought with her what I now understand was a small box of beads, though at the time, it seemed like quite a collection.  She introduced me to beaded beads at that time. I'll skip the part ...

Leaving white space is tricky

Image
I was planning to leave some parts of the fabric unpainted (except for bleed), but it is just so much fun to splash color on there, that I forgot. I did a pretty good job keeping the colors from going muddy on the first dying, but on the second I was not as careful. I think if that white space had been there, I'd have managed it. Maybe. I also got some dark smudges in my first dying, I think by having a big blob of pigment on my brush when I first started to paint. I'm not sure that's what did it, but I was more careful on the second go, and I think I didn't add any new smudges. So, I'm getting better at it, but still working. I'm still happy with my diatoms. Nice little beasties.

If at first it seems to work, dye dye again

Image
I added another layer of purple paint to my diatoms and stuck the stencils down on top for another go. I think layering that dotty diatom on top of itself (bottom image on the left) might have been a bit much, but the process was definitely a success. Now I can make a veritable sludge pool of microbiological beasties, though I'm still shooting for cleaner colors. On that note, I made another layer on my yellow and pink test run, as well. You can see in the top right where the yellow is on top of a blue/pink mix. It makes a bright but muddy color, if such a think makes sense. Even the yellow on top of the pink loses some of its lushness. I'm not sure I don't like it that way, though I would like to be able to control when I get muck and when I get clarity. Yellow on yellow worked nicely. For my next trick, I will paint the fabric, without stencils, leaving some white. Then I will paint over with the same colors and add diatoms.

Sun dying results

Image
Here are my first diatoms on fabric. I'm so excited about the stencils! Now I'm ready to learn to put some texture and depth into the background. I did make one discovery: the colors do better if they blend by them selves on the edges. When I paint one color over another, I get a blend, but it is muddier. (Though I admit that might be because the blue I'm using has some black in it). For example, on the test patch below, I did not overlap the yellow and the pink. They bled into each other at the edges, but I tried not to brush one over the other. These are the brightest colors I've managed so far. On the diatoms, I used only purple paint, not mixed with other colors. I think I need to buy more colors!

I'm dyeing!

Image
I'm sun dyeing again. Here is a blog showing the process: LuAnn Kessi's Blog In my last dyeing experiment, I laser printed an image onto an overhead projector, acetate slide, and pinned it to my fabric. I was hoping the printed image would mask the sun, but the slide itself would let the sunlight through. In fact the slide masked the sun, and created a very crisp rectangle, as the paint pooled a little around the edges. The vinyl also gave a very crisp image, but it is hard to reuse the vinly, since it rolls up and sticks to itself when you peel it off. So I thought I'd try making some stencils out of acetate, which I can rinse off and reuse. I drew some diatoms ( What's a diatom? Artist Ernst Haeckel ) using Adobe Illustrator, and cut them out of acetate using my plotter cutter. They are now sitting in the sun, and I'm writing this entry partly to keep myself from watching the paint dry. Here's an image of my stencils. I hope it works! One great thing abo...

Fabric! Do I need a new hobby?

Image
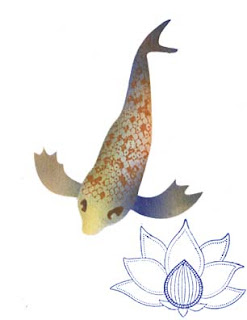
Once upon a time, not so long ago, I spent some time playing with stencils. My blog post about using stencils and stamps to make this fish I loved the effects and sharpness of the images I got, but I didn't love working on paper that much. I didn't really have any finished product that I wanted to make out of paper. Somewhere along the line, Gwen suggested I use fabric instead. I didn't know much about fabric paint (which remains true), and I ignored her. Recently, though, I came across a blog post (or 20) about using Setacolor transparent fabric dye to sun print. The paints were not too expensive, so I ordered a few (from http://www.dharmatrading.com/ ) to give it a try. I ordered the transparent paints for sun dying, and a set of metalic paints with hopes of using them in the stencils that I make like I did with the stamping ink. This morning, I gave it a shot. Some of my experiments worked not at all, and some of them were OK. This fish came out well enough to ...

Handmade Brass Pendant

Image
Also at Ruby Tuesday Bead Company, I bought a brass pendant that the shop owner embossed and embellished. I used Cynthia Rutledge's pattern from the February/March 2011 issue of Beadwork Magazine to make this pendant.

Sakura Charm!

Image
I visited my local beadstore, Ruby Tuesdays in Long Beach, and bought (among other things [grin]) a strand of purple petals. They are not the shape required by Cindy Holsclaw's Sakura Charm pattern , but I thought I'd give it a try. It took me a few attempts to decide that the petals were not going to fit with the pattern as written, and then I got lucky, and tried just changing all of the size 15/0's to 11/0's. It worked like a charm! I love my little pendant. Thanks, Cindy!

Another Peyote Tube

Image
This peyote tube uses the same pattern as the first one except that I used different sizes of crystals. These top drilled bicones have always looked interesting to me, but I've not found a good use for them. Here, they make the tube quite stiff, so there was no need for extra reinforcement. Gwen used these beads in her version of Cindy's Sakura Charm . They look fantastic. For sale in Gwen's Etsy shop: http://www.gwenbeads.etsy.com I'm definitely going to have to give that a try. Time to order bicones; Fire Mountain Gems seems to have them on sale!

Hitching a ride on the peyote band wagon

Image
Here is my fourth or maybe my fifth attempt to make something using peyote stitch. It is stable, not to squishy and easy to make. I made fairly fancy ends (you can't see them from this angle) in an attempt to make it sturdy, and in the process figured out a better way to make it stable without the end structure. So on my next go, I'm going to forgo the end structure, and hope for a fuss-free non-squishy tube. In the meantime, I get to wear this one!

Doceri.com Movie!

Image
I made this movie by drawing on my iPad using a software called Doceri (Visit Doceri.com ). Doceri lets you play back your drawings one stroke at a time, or a few at a time, so it is easy to make animation like this. My kids like to watch their drawings draw themselves.