Posts

Frog III

Image
Frog III by Florence Turnour This frog is the same size as the first  Twinkling H2O frog . The paper is 6x8 inches. I reduced the  second frog  by 50%.  I am thinking I want to work small so I can trade ATCs with someone someday. What I learned from the last two frogs is that I have to be more careful with my backgrounds. In this painting I used my brayer to add a layer of ink and a layer of distress paint, which show through the subsequent layer of gesso only slightly. I wrapped the brayer with a layer of gauze when I rolled on the gesso adding texture to my paper. Finally, I painted the leaves with Twinkling H2Os. I had hoped for more contrast between the larger leaves and the background leaves but I don't have enough colors of paint. Yet. I cut the pieces of the frog from paper inked with Distress, and glued them to my background as a collage. Every leg and arm segment is a eparate piece of paper! To finish, I traced the leaves in black and the b...

Another Frog

Image
This frog is smaller than the first one  because I reduced the sketch on the photocopier before tracing it onto the watercolor paper. I watched this video  by Dion Dior  showing a demo of painting with Twinkling H2Os , and noticed that she used watercolor pencils along with her paints, so I thought I'd give that a try. It's getting me closer to going multimedia (my goal). I'll let you know when I get there. Maybe when I do, I'll switch to a new frog sketch. Painted Frog - Twinkling H2Os and Watercolor Pencils Dion Dior did her background after she painted the focal image, but that's messing me up a little. I'm ending up smudging my image while messing with the background. More finesse is needed. I'm thinking about inking in my background first, next time, possibly avoiding the fuss.\ Thanks for looking.

Frogs

Image
Stuart and I had a frog drawing session. The next day we transferred the images to watercolor paper and painted then in with Twinkling H2Os, a watercolor paint laced with mica. Here they are: Frog with Painted Patterns by Stuart Turnour Red-Eyed Tree Frog by Florence Turnour I love the effect of stamping with clear embossing powder and then painting or inking among the white outlines of the image. But I wanted to participate in a project requiring original artwork, without stamps, and I had trouble getting that embossed resist effect without embossing powders, and I haven't enjoyed using the powders without the stamps. Then, I found these gel pens called Glaze that leave a three dimensional trail that resists watercolors and inks. Media In this project, I drew my frog from a photograph, and then traced the image with a clear Glaze pen on watercolor paper. Then I painted the image with Twinkling H2O paints. Did you ever notice that frogs have an extra set of knees...

Early Spring

Image
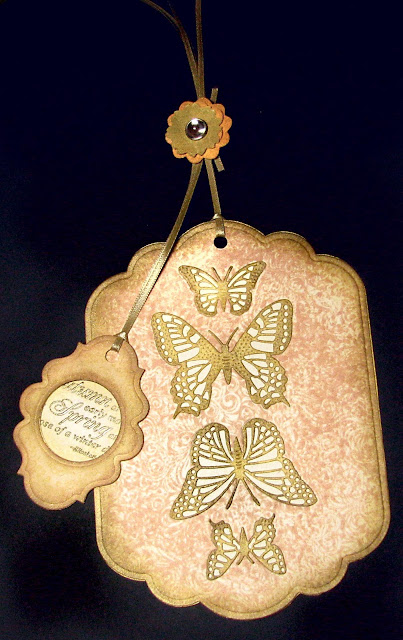
Everyone around me seems to think it is Spring all of a sudden. Three of the challenges that I follow, if not actually enter, are asking for Spring themed cards. The farmer's market was packed, and even the grocery store seemed busier than usual. I made this card for the   Justrite Stampers  Friday Challenge, "Suddenly Spring." (Nice name.) Early Spring I used the retired Justrite Original Nature's Nested set for my sentiment, cropping to feature the words "early Spring." The frame is stamped with a stamp from the Kindness set . Early Spring sentiment I cut out the butterflies with Cheery Lynn's Exotic Butterflies medium and small from the middle of a sheet of paper. Then I inked gold onto the butterflies and stamped the background with Justrite's Elegant Fronds background stamp (my favorite background) several times to cover the full area of the card. I cut out the card using a Spellbinder's Grand Calibur die, and sponged the edges ...

Peace Cat

Image
I made this card for the Justrite Stampers Friday Challenge 091 , which is a color challenge. Here is the challenge inspiration photo. The zig-zag on the cat, the doily on the background and the peace sentiment were all made with Justrite stamps. I cut out the cat by hand (and without drawing it first; lucky it came out at all!) from white cardstock, stamped and otherwise inked it, stamped stitched the background and put it all together. It was fun to get back to my more usual non-frilly self. Thanks for looking!

Celebrate!

Image
Celebrate! Why not? I had a great time going to the Anaheim Scrapbook Expo with my friends last weekend. I decided to use Justrite Friday Challenge to try out some of the products I purchased. Here's my card, "Celebrate!" Celebrate! Justrite Friday Sketch Challenge #090 This is my second sketch challenge. I'm still getting the hang of it, which in my case means I pretty much copied the sketch. My favorite new item so far is the glittered embossing powder I bought from  Sparkle N Sprinkle . I have long wanted to glitter my stamped images, and I've done it with the glue stamp pad, but what a pain to clean the stamps and myself and my work area.  I shy away from that glue every time I think of using it. The Sparkle N Sprinkle product is embossing powder infused with glitter leaving the image both crisp and sparkly. Neither the pictures in the Sparkle N Sprinkle shop that I linked to above, nor these pictures of my card really do a great job showing the glit...

Enjoy

Image
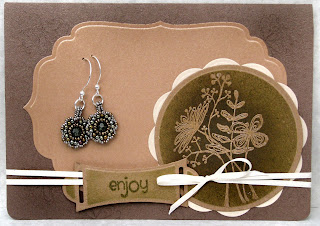
I made this card for a Unity Kit Club Sketch Challenge. After writing this post, I figured out that I missed the deadline for the challenge. Sad sad. So I'm entering it into the Fashionable Stamping Challenge ( Surprise Us ) and Simon Says Stamp Challenge ( Anything Goes , along with 500 other people), and Loves Rubber Stamp Challenge Blog ( Anything Goes ). December 2012 Unity Sketch Challenge I've not managed to use a card sketch before, though I like the idea of having a plan before I start pasting. I actually bought a book of sketches that I like to look at, but still I have yet to actually put shapes in the places they suggest on a card.  In any case, this time I wanted to play along on the Unity Stamp Blog, since I bought some Unity Kit stamps.  So I gave it a go. I made this card to hold these earrings I made for a fellow beader, as part of a new year's earring exchange. (I hope she doesn't look at my blog before I get them mailed off!) The earrings mak...

Picture This!

Image
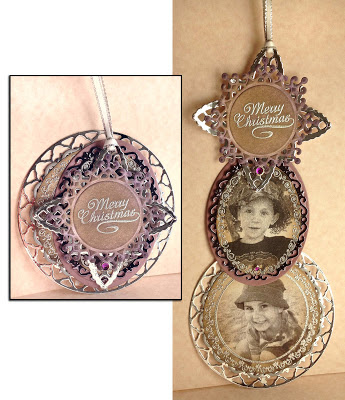
I'm at the end of my semester and thought I'd steal some time to enter a challenge from Justrite stampers. This week, the Justrite Friday Challenge was to include photos in our projects. Merry Christmas from Benjamin and Stuart I used eight different Spellbinders sets in this one! I have always loved how Justrite borders coordinate with Spellbinders dies. In this project I used borders from Justrite Original Beautiful Blossoms and Kaleidoscope Medallions  (which are now retiring and selling for just $5 each!) to stamp and emboss silver borders on my black and white images. The "Merry Christmas" sentiment is from Christmas Vintage Labels 1 . I cut them out with my Spellbinders dies, and sponged with Frayed Burlap Distress Ink to get the sepia tone. The Telescoping card design came from Beate at Splitcoaststampers.com . Inspired by her video, I've made three three telescoping cards, including this one. The first is a goofy tea party , and the second one i...

Independence Day

Image
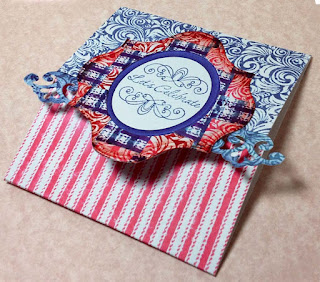
I've heard of Christmas in July; what about Independence Day in October? I made this card for Justrite's Friday Challenge, "Three's Company."  The challenge was to create a card with three coordinating patterns. Let's Celebrate! I used the Justrite Elegant Fronds background stamp and the Justrite Ticking Stripe background stamp  to create my patterned paper. For one pattern, I stamped the Ticking Stripe stamp twice, at right angles, to make a grid, which came out very nicely. For all of them, I used distress ink, and before stamping, I misted the stamp with water. This makes the ink diffuse slightly, appearing more watery and not as crisp. Following Beate John's tutorial on the Spellbinder blog , I cut two of the patterned papers into strips and wove them together, and then cut the resulting weave using Spellbinder dies, to make my frame. I used a Spellbinder border die to cut the blue edging, and sponged it to provide contrast. My sentiment is ...

Fish!

Image
I'm visiting my mother in Oregon, and thinking about dying some fish fabric for her to use in a quilt. Do you like anchovies?